
Create your first angular application in typescript using angular CLI
The Angular CLI is a command line interface tool that can create a project, add files, and perform a variety of ongoing development tasks such as testing, bundling, and deployment.
Now, let us start with developing our first angular application.
Note: It would be best practice if you create your own development environment to develop any angular application.
Create your own development environment:
Before starting with our new angular application development, make sure that you have installed Node.js® and npm on your machine. Also, verify that you are running at least node 6.9.x and npm 3.x.x by running node -v and npm -v in a terminal/console window. Older versions produce errors, but newer versions are fine.
Run below command in a terminal/console window to install Angular CLI globally on your machine.
npm install -g @angular/cli
Create your first angular application:
We are done with creating our own development environment. Now it is time to create our first angular application.
Run below command in a terminal/console window, which generates a new angular project and folder structure for you.
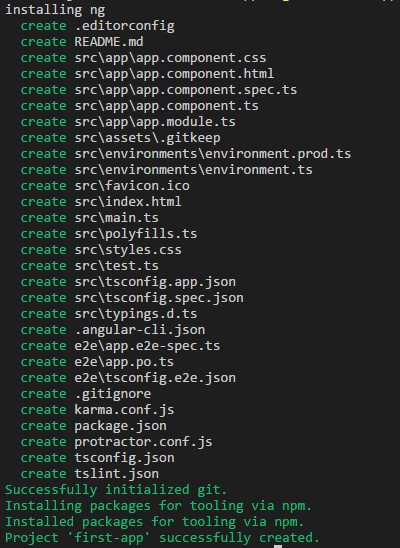
ng new my-first-app
Note: Patience, please. It will install npm packages and create a folder structure for your application.
Run your application:
Go to the project directory by running below command.
cd my-first-app
Run below command to open your application in the browser.
ng serve --open
The ng serve command launches the server watches your files and rebuilds the app as you make changes to those files.
Using the –open (or just -o) option will automatically open your browser on http://localhost:4200/.
Finally, Update app.component.ts file “title” property automatically browser will reload with your changes.
import { Component } from '@angular/core';

@Component({
  selector: 'app-root',
  templateUrl: './app.component.html',
  styleUrls: ['./app.component.css']
})
export class AppComponent {

  title = 'Hello from TechXposer!!!';

}
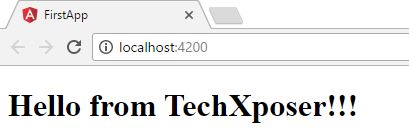
hip hip hurray… Now you could see your first angular application running successfully. 🙂
Other useful commands and notes:
Happy Coding 🙂

